Documentation, pictures, and drafts for my Figure Modeling Final.
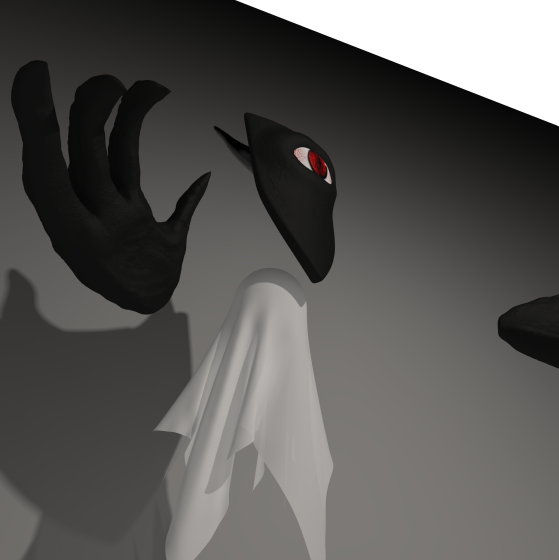
I had decided to do a non human model slightly similar to my Animation 1 Final project model. I wanted to create an eiry feeling creature that’s kind of just always there and you really don’t want it to be there.
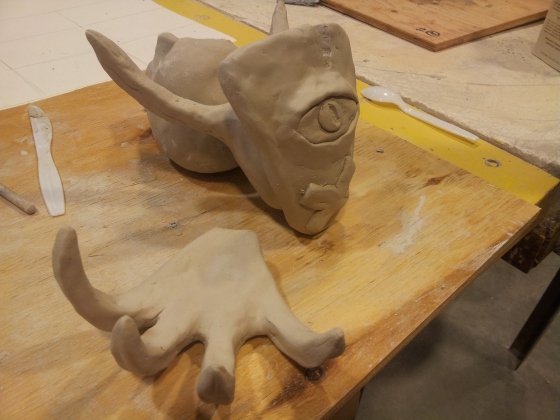
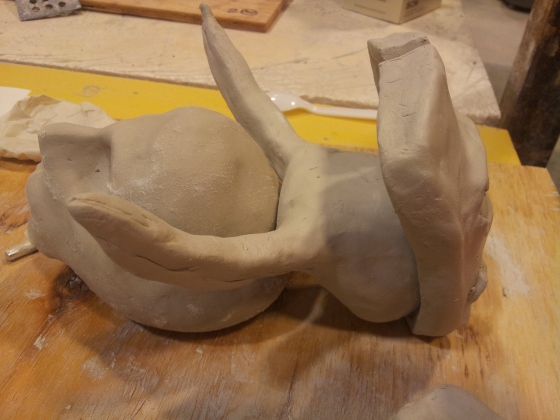
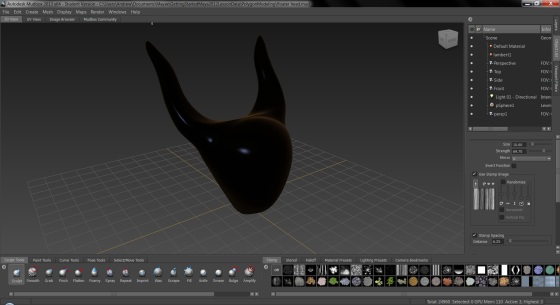
Here are the drafted clay models of the final model.
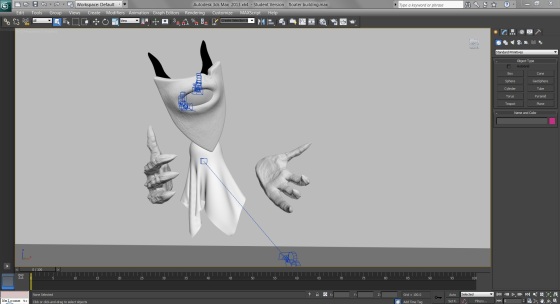
Up next here are the individually built parts.
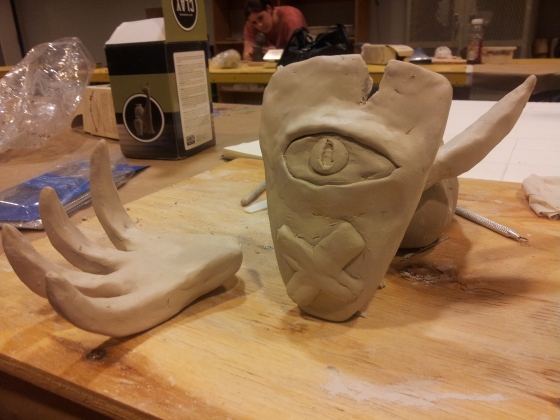
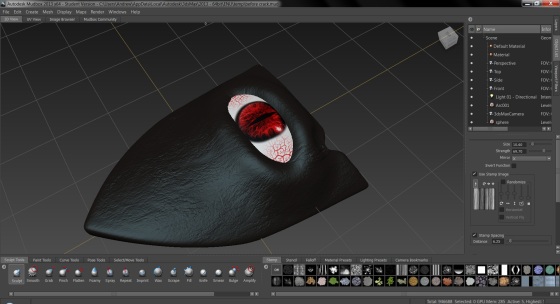
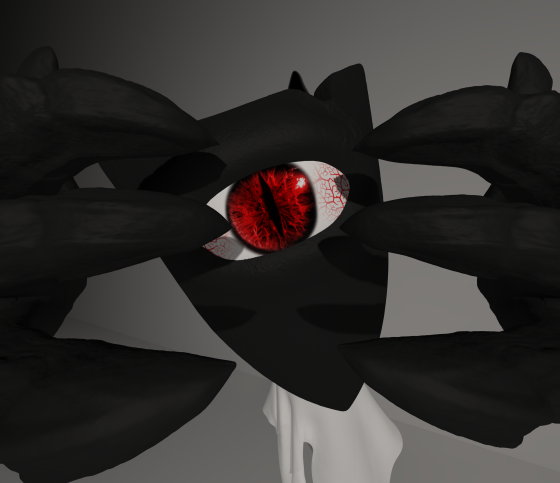
For the mask I took a triangle for the base mesh bent in the correct places and was then molded for the eye to fit and any further detail.
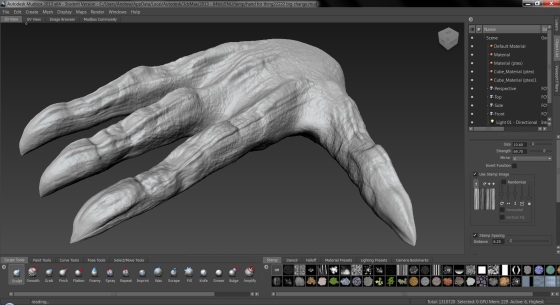
To create the hand I started with a basic three finger hand for the base mesh and then molded it into a more reptilian style.
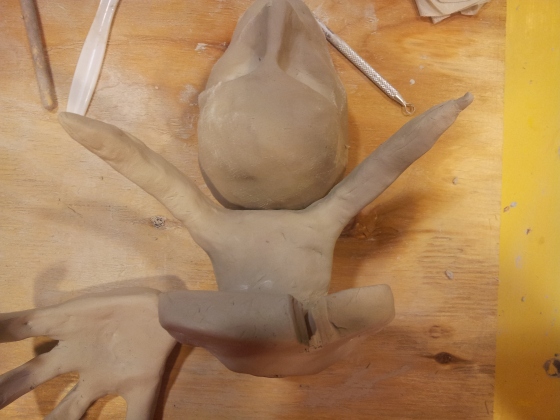
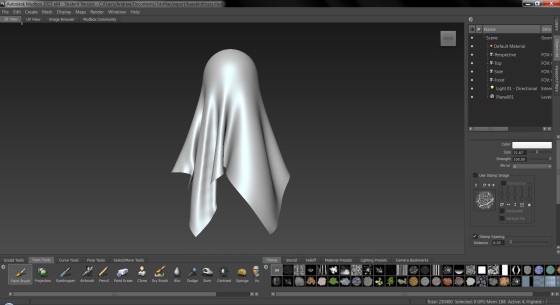
The cloth body’s base mesh started as a plane with simulated physics which was then better molded to create a more realistic cloth appearance.
The last part of the body was the head. I build it from a sphere base mesh and modeled it similar to my last model only this time I used mud boxy to create it.
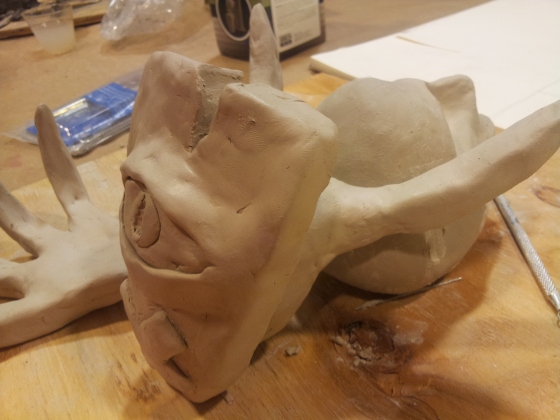
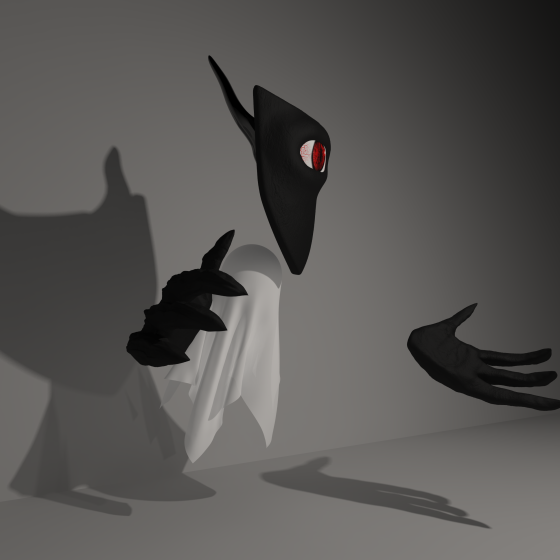
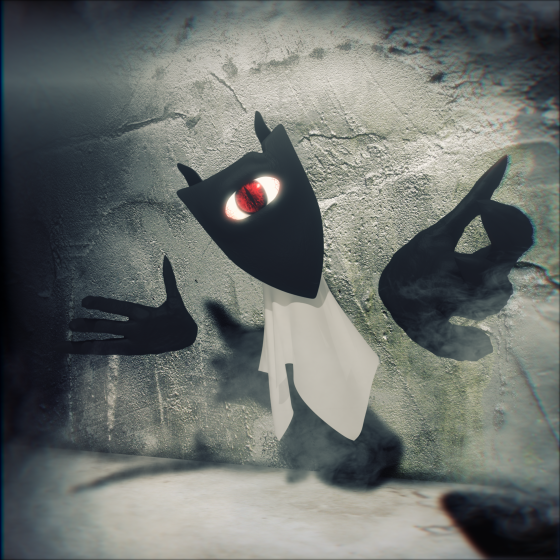
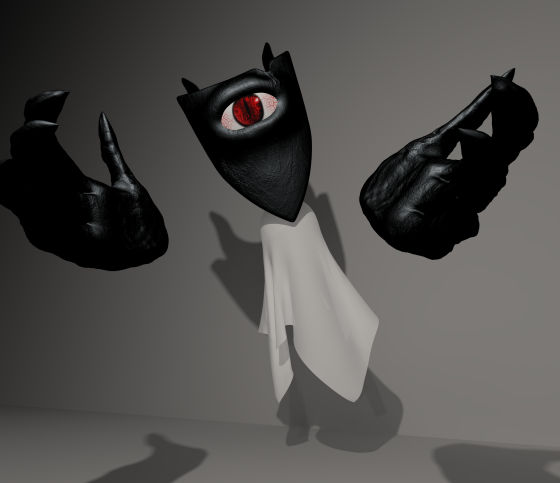
After all the parts were put together this was the final product.
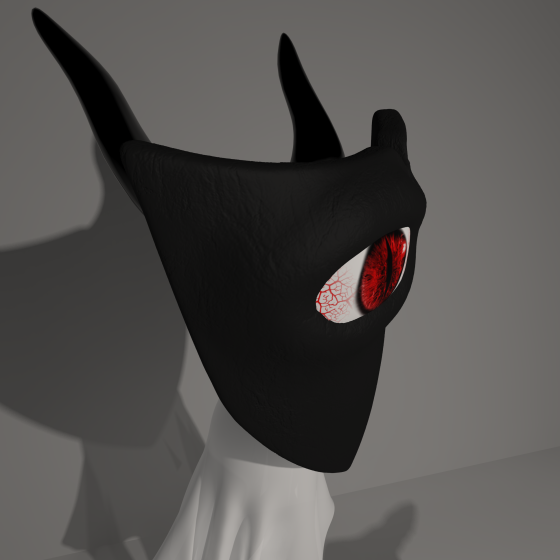
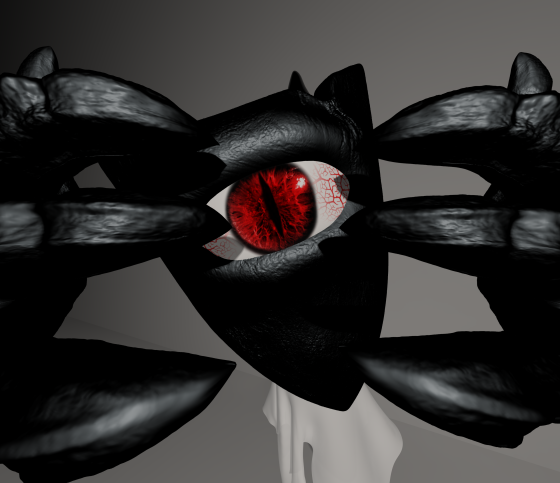
I had then decided on a better skin material and this is what the model now looks like rendered without any post editing.
Here’s a high light video of the live stream where I showed off the basic of how to use MikuMikuDance with After Effects, The video is about an hour long so grab some pop corn and be prepared to laugh and cry!
For my final project in my Animation class, IMM 210 wanted to make an entirely modeled, rigged, and animated model from scratch. I had just come off of finishing my MMD Momi Cup 2 entry and that whole post “I just made a huge animation and now I have no ideas” phase was taking effect, but none the less ideas still wroked their way into my head. The original concept came from one of my previous creations, the cute snake with headphones. I had decided that I wanted a more humanoid version to accompany him and to create a whole new concept story. (This means there will more models in the future like this and possibly a whole entire world to go with it.)
At first I had to start with creating the base of the body for the model with polygons.
Next I had create and attach the hand to the body after splitting it in half. I decided to go for the standard 4 finger cartoon styled hand.
After creating and attaching the hand I had to model and create the base of the models leg.
After creating the leg I had to create the basic foot and then attach it to the leg.
After mirroring the geometry I had to create the base of the head and attach to the neck.
The next step of the process was to model the shape of the head to match with the snake creature.
Now it was time to start working on the clothing for the model, the shorts were the first to be made.
Next was the shirt.
Then the hoodie.
Then the hood on the hoodie.
All of the modeling at this point was now complete and it was time to begin rigging. I made the skeleton of the model based on the version of the model without clothes since that would be where the actual bones would be located.
I then added the appropriate skin weights to the model and its clothing so that the skeleton would move the model.
After that it was time to create a bunch of pictures with them using Maya and Cinema 4D!
As for the future of this model I would not count this as it’s last appearance in fact everything created in this project is an entirely new original concept I would like build on. Expect there to be several similar characters created and perhaps a whole animation to go with it. Also expect this model to be upgraded in the future as I am hoping to put a lot of time into learning how to modeling higher detail and better looking clothing for models.
So yesterday I met someone who helped me out a lot with the material in Cinema 4D and ever since I’ve been pulling a whole bunch of of my models into Cinema 4D to see how cool I could get them looking. Here’s the snake from my midterm project with some new swag in both terms of head gears and glossiness.
Note to all readers of this blog. The purpose of the this post is to serve as documentation for my Interactive Multi Media 210 Animation Level 1 Class Midterm so that I can receive a good grade. This post will include everything from the project proposal to the story board to the production log. Readers can read about how the project was brought about and created.
Part 1 Project Proposal:
For around 3 to 4 years I have always turned to using 3DS Max for 3D animation. Now that I am here at a college who’s taught animation software is Maya I am currently in the process of what you could call migrating over to Maya. So far everything has been quite easy to figure out except for the fact that I could never really get the default Maya materials and textures to look all that much pleasing. I then realized that Maya just like 3DS Max has Mental Ray included with the software. Since my very first version of 3DS Max was the design package where if I remember correctly was Mental Ray I had learned this render package even before the default render package. I figured that I would greatly benefit from learning Mental Ray with Maya so I could better relate the skills I’ve acquired in 3DS Max with Maya. So to better learn mental ray I went on to play around with a bunch of the features that mental ray has to off. Ambient Occlusion, Final Gather, Global Illumination, reflections and refraction, shadows and more.
Part 2 Story Boards:
Reflection and Refraction Testing:
Caustics Testing:
Animated Movement Testing:
Final Gather Testing along with Default Physics Engine:
Part 3 Project Production log:
Mental Ray Lighting (Area Lights, Global Illumination, and Ambient Occlusion)
Perhaps the most powerful tool of Mental ray would be it’s lighting capabilities this includes everything from area lights to global illumination to ambient occlusion.
No Global Illumination
Global illumination
Global Illumination settings are located in the render settings under indirect illumination.
Ambient Occlusion
Ambient Occlusion must be turned on in the Material Settings. The more samples the more accurate it is however this adds render time. Distance determines how far the shading from ambient occlusion can reach.
And then Ambient Occlusion must be turned on in the render settings under indirect illumination.
Are lights
Area lights work very well in mental ray since it easily lights up an entire area. Note ambient point lights in Maya do not work in Mental Ray.
Area light setup.
Part 2 Reflections and Refraction:
For reflections I used the MIA material in mental ray which produces a nice reflective and shiny material.
Refraction can be achieved with the dielectric material for things like water and glass. I used the shown settings for the glass and water in this scene.
Also you must increase the ray trace amount and depth so that the water can fully travel through the glass and water.
The number of ray trace refraction samples must at least be equal to the amount of collisions the light has to go through. In this case the light has to go in the glass out the glass in the water out the water, in the glass again and out the glass again, so it at least has to be set to 6 an a depth of probably at least 10.
Part 3 Final Gather:
Final gather is a indirect lighting setting that causes all objects in the scene to diffuse and emit a small amount of light in the the scene and can be used to achieve the desired effect.
For this I turned on final gather in the render settings for mental ray.
For the materials I used a toon shader which produced a very flat and bright object which looks like it glowing.
Part 4 Caustics:
Caustics are the effect where light shines through perhaps glass or water and produces a very defined light on the ground it is cast on.
\
For this I used a blue Dielectric material for the glass. For lighting I used a dim area light to give the scene dim lighting. Then using a spot light to project photons without emitting light to pass through the glass and create the caustics on the ground using the photon a photon shader.
I don’t think it’s any secret that I love MMD PV’s, they are practically the whole reason as to why I’ve chosen to study to become a 3D animator. Not to mention that now I myself have started making MMD PV’s on the side separate from my college work. So yeah I’d like to show off my top ten favorite MMD PV’s of all time!
Number 10: Heart Shooter by Brother-P
I’m not going to lie here I hate having to pick a number 10 only because that means it is on the bottom of the list. Anyway at number 10 we have Brother-P’s MMD PV Heart shooter with the song created by Misoshiru-P, dance motion by Radi-P and costume design by AruP. Filled with wonderful colors and choreography this PV finds itself at the 10th spot on the list.
As far as I can remember Cort has been making MMD PV’s and they have always been very good. What’s more amazing is that he create many of these PV’s without much use of external editing programs like After Effects and Cinema 4D earning much of my respect. This PV is no different, perhaps having the greatest facial animations of all MMD PV’s to this day. Throw in an amzing Gumi song by 164 and you have a deadly combination of amazing visuals and mind melting music with a moving story to top it all off. On top of that this PV took 2nd place in the 8th MMD Cup.
Number 8: Electric Love by WakamuraP
A seasoned classic from WakamuraP’s collection of MMD PVs. This is Minimalist animation done perfectly WakamuraP only needed Miku, an abstract rainbow tower, and a slew of particles to make an amazing PV that I could watch on endless replay. Also it has an Iphone App. The song Electric love by 8#Prince.
Another PV from Wakamura is one of his more recent PVs, Baby Maniacs. Ever cut jump and pan in this PV is spot on perfect and it really adds to the already massive amount of musical energy. The song itself once again by 8#Prince is of course amazing as well.
Called me biased as much as you want but I’m a person who takes in pride in his work. At number 6 we have the MMD PV by yours truly, Bye Bye. Looking beyond the fact that I created this PV I really truly love this PV. After fixing just about everything I didn’t like about the PV I had made before I consider this video to be my flag ship of animations at the moment. The amazing song Bye Bye by hr/Ecchi-P really tops off this amazing PV. (Video will not be posted until March 25th due to it’s entry to the Momi Cup 2).
Video Pending
Number 5: Strobe Last by MasatakaP
To start off the top half of the list we have a video from MasatakaP himself. Strobe last was first presented at the LA anime Expo and it is quite an amazing PV as expected from MasatakaP. Filled with an overwhelming amount of abstract art and symbolism with one of the coolest songs by POWAPOWA I have ever heard.
I really really loved this PV from Brother-P the cubes and color scheme alone made it just that amazing. Song is a remix of the original song by kous remixed by sasakure.UK.
Another one of my favorites this was one of the most surprising from Brother-P considering this is one of the first PV’s I’ve seen that really have this massive set stage that looks so amazing. A perfect combination of MMD and Cinema 4D to create an amazing video for the amazing song by millstones.
Number 2: Tell Your World by WakamuraP x fantasista utamaro x TAKCOM
The creators of this video must have known that I was going to write this blog post today because that is exactly when they posted it up on YouTube, TODAY. Even though I have only just seen this video today it was already able to throw itself up to the number 2 spot. Tell Your World the MMD PV for perhaps the greatest song from Miku of all time by kz-livetune. This PV seriously belongs in an IMAX theater in 3D since I already feel that it jumps off the screen without even having glasses on a regular monitor. Song, video, dance, everything…perfect…Everyone creator *shot for cheesyness*
Number 1: Chaining Intention by MasatakaP
Taking the throne of my list of top 10 MMD PV’s we have the master piece that is Chaining Intention. This video is a legend of the MMD world as it is one of the first of it’s kind way back to the days of the 4th MMD Cup (2 Years Ago). MasatakaP showed just how powerful MMD can be when combined with After effects. The video had instantly taken the 1st place trophy at the 4th MMD Cup and rightfully so. With the song created by Treow this MMD PV is a legend among legends in the MMD community.